

This article outlines how you can integrate your managed ERPNext installation with Dropbox to automatically back up your ERPNext data.
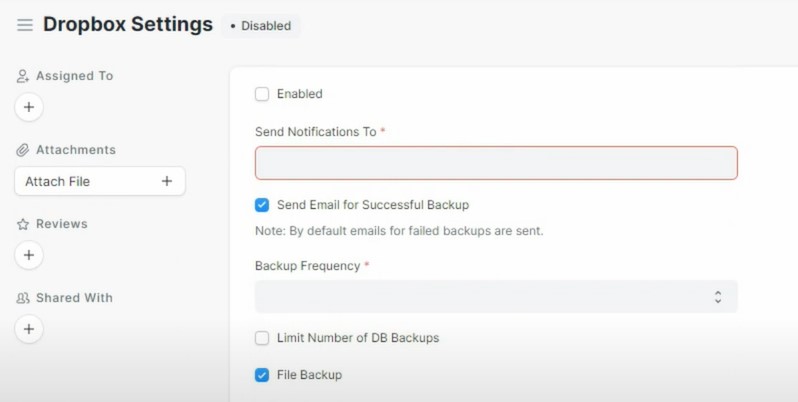
Step 1: In your ERPNext installation, go to "Integrations" -> "DropBox Settings" and tick the "Enabled" Checkbox. Enter the email address to which notifications will be sent, then set the desired backup frequency then click on "Allow DropBox Access".
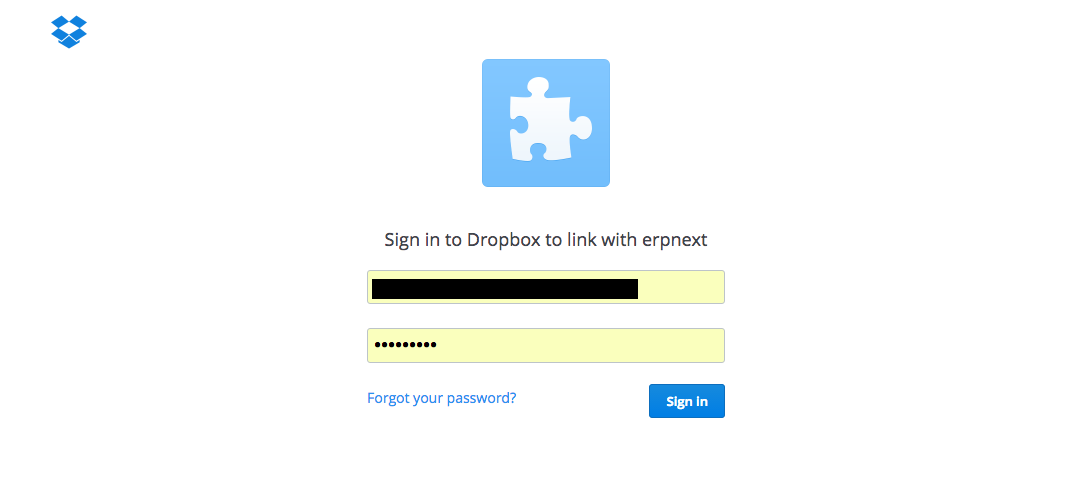
Step 2: After clicking “Allow Dropbox Access”, the Dropbox login page will open. Log in with your Dropbox credentials.
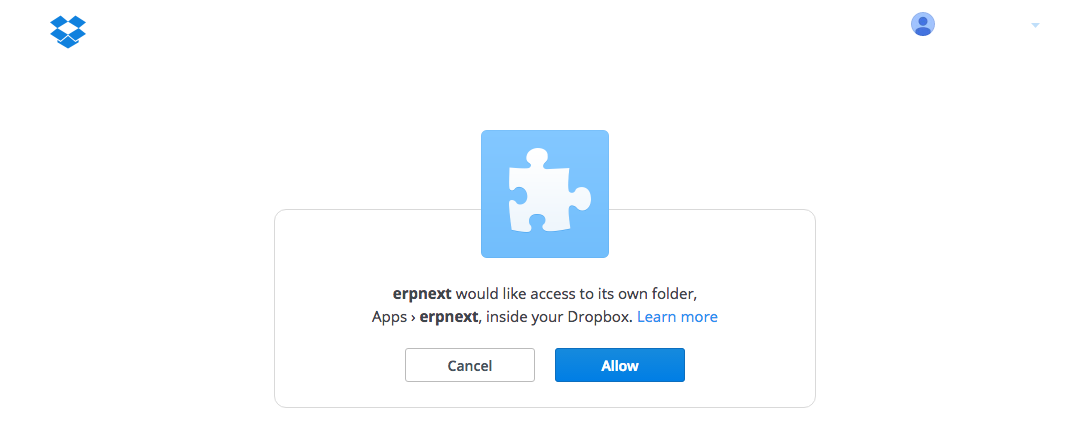
Step 3: On successful login, you will see a confirmation message. Click on “Allow” to grant ERPNext access to your Dropbox account.
A folder called "ERPNext" will be created in your Dropbox account, and database backup will start to auto-download in it. Congratulations! You have successfully integrated your managed ERPNext instance with DropBox to be able to back up your organization's data to DropBox.
See Soladrive's managed ERPNext service plans here

