This article will outline how to install an R1Soft agent remotely to a protected machine from the Server Backup Manager. This option is available in the "Actions" menu of a protected machine if the machine doesn't have an R1Soft agent installed. These are the steps to deploy an agent from the Backup Manager.
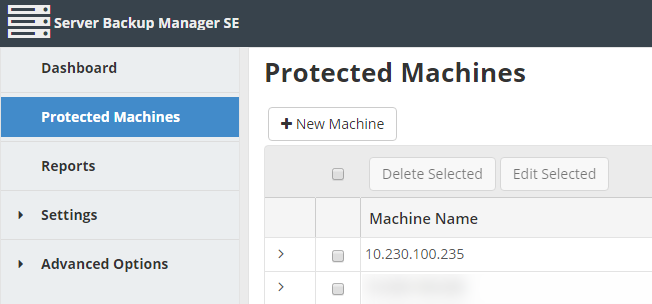
Step 1: Navigate to the "Protected Machines" page from the main menu to see a list of all the protected machines in your R1Soft instance.
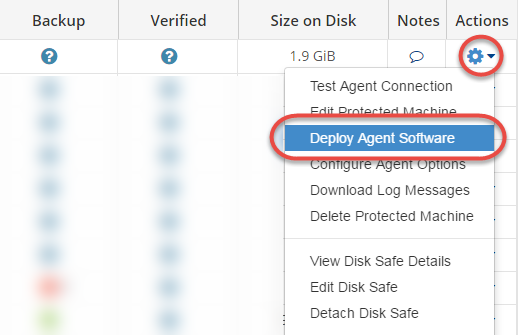
Step 2: Select a machine from the list and on the right-hand side of the screen, click on the "Actions" icon for this machine and select "Deploy Agent Software".
Step 3: Log in to the remote machine. On the next window, in the Username and Password fields, you should enter the credentials of an administrator with access to install the Agent software on the target machine. You can ignore the reboot option for Linux servers since they do not require a reboot after an agent installation.
 Step 4: Configure advanced deployment options. In the Advanced Options section, select one of the following options:
- Default Configuration. On Windows, the user's temp directory is used to store the installers by default. We use /tmp to store the installers by default. If the directory doesn't exist or doesn't have enough space, the user's home directory will be used to copy the installers. The port number is not required for Windows deployments. The default port used for connecting to a Linux machine is 22.
- Custom Configuration. Select this option to use a custom configuration for the deployment and make entries in the following fields:
- Connect Using Port. If you are connecting to a Linux machine, enter the port number that will be used to connect to the target machine. The port number is not required for Windows deployments.
- Temporary Path. The temporary path is where we store installers during deployment. The path should be absolute and already exist. If there is not enough space available to store the installers, the deployment will fail.
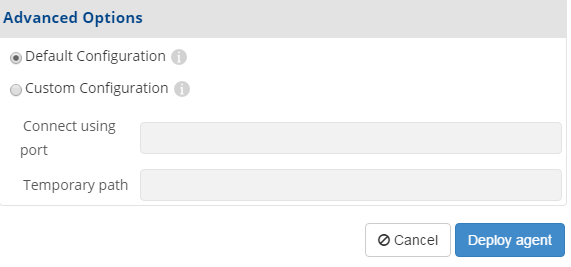
Step5: Click on the "Deploy Agent" button. This will deploy the agent to the remote machine with the configurations you have set.
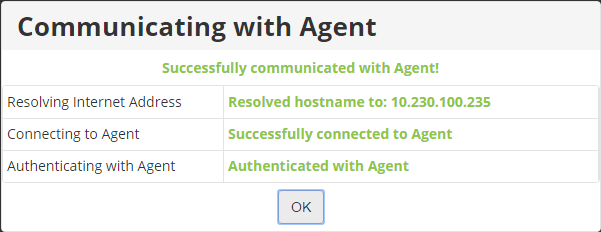
Step 6: Confirm the agent deployment to the machine. Click on the "Actions" icon of the machine where you just deployed an agent to and click on the "Test Agent Connection" option as shown below.
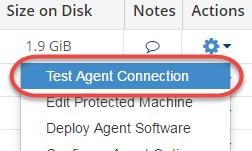 You will see the following interface displaying the status of the deployed agent. In this case, the deployment was successful.
Congratulations! You have successfully deployed an R1Soft agent from the Server Backup Manager.


