

This article will outline how to restore individual files using the R1Soft Server Backup Manager. The R1Soft Server Backup Manager allows you to restore individual files from any recovery point. You can restore your selected files to the original location, to another server, or download them to a local HDD.
Step 1: Click on "Protected Machines" in the main menu to see the list of all the protected machines.
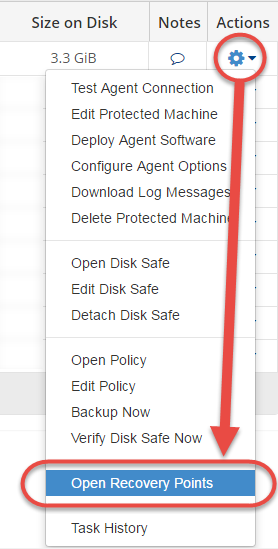
Step 2: Select the machine that contains the files that you want to restore. Then click on that machine's corresponding "Actions" icon on the right-hand side of the screen and select the "Open Recovery Points" options as shown below. This will display a list of all the recovery points for that machine.
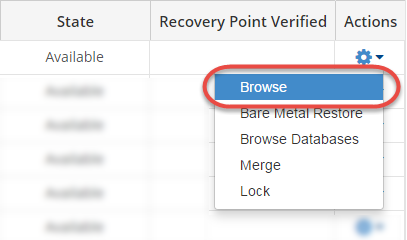
Step 3: On the Recovery Points interface, select the desired recovery point. Then click on that Recovery point's corresponding "Actions" icon on the right-hand side of the screen and select the "Browse" option as shown below. If you had enabled encryption when creating the disk safe, you will be prompted to enter the encryption password. You will see a list of files and folders that are present in that recovery point.
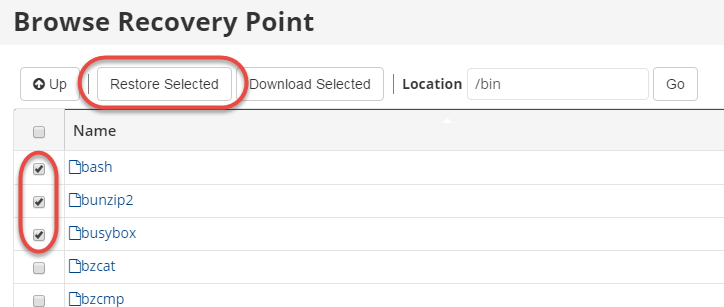
Step 4: Select the checkboxes next to the files and folders you want to restore and click the "Restore Selected" button as shown below.
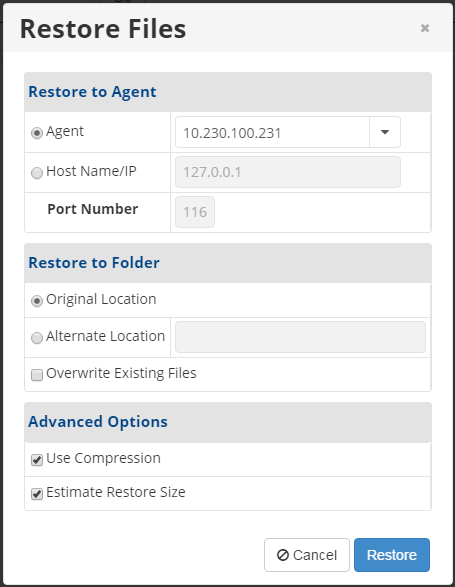
Step 5: You will see the interface below. On the first section labeled "Restore to Agent", you can choose to restore the selected file to the selected protected machine that is already in the system and has a Backup Agent running or you can restore the files to a different host. For the former, select the "Agent" option. For the latter, select the "Host Name/IP" option. In the "Host Name/IP" field, enter the name or IP address of the host where you want the recovered files to be saved. In the "Port" field, enter the port number to be used with the specified host.
In the next section labeled "Restore to Folder", if you select the "Original Location" option, the files will be recovered to the same folder from where the recovery point was created. If you select the "Alternate Location" option, you will specify a path on the Host to restore the files to. The complete path and directory structure of all selected files will be created under the path specified here. If the specified path does not exist, it will be created. The "Overwrite Existing Files" field is optional. Select this check box to overwrite any existing files or directories with the same name, even if they are newer.
In the "Advanced Options" section, all the fields are optional. Compression works under the hood using QuickLZ. If the compressed size is larger than the uncompressed size, the files are sent uncompressed. If the "Estimate Restore Size" option is enabled, you can see the additional "Estimated Restore Size" and "Estimated Object Count" values in the "Reporting" page - "Summary" tab - "Restore Status" area.
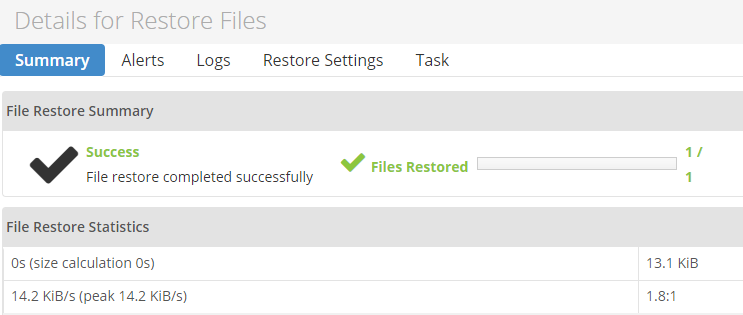
Step 6: Click the Restore button to start the restoration process. The Details for Restore Files screen displays the progress of the task. This screen can be closed and reopened from the Dashboard. Once the file restore is complete, the Details for Restore Files screen automatically displays details of the restoration process as seen below.
Congratulations! You have successfully restored backed-up files in the R1Soft Backup Manager.

