This article outlines how to integrate your ERPNext installation with Google Drive so you can back up your ERPNext data safely and efficiently. First, you need to authorize ERPNext to upload files to Google Drive.
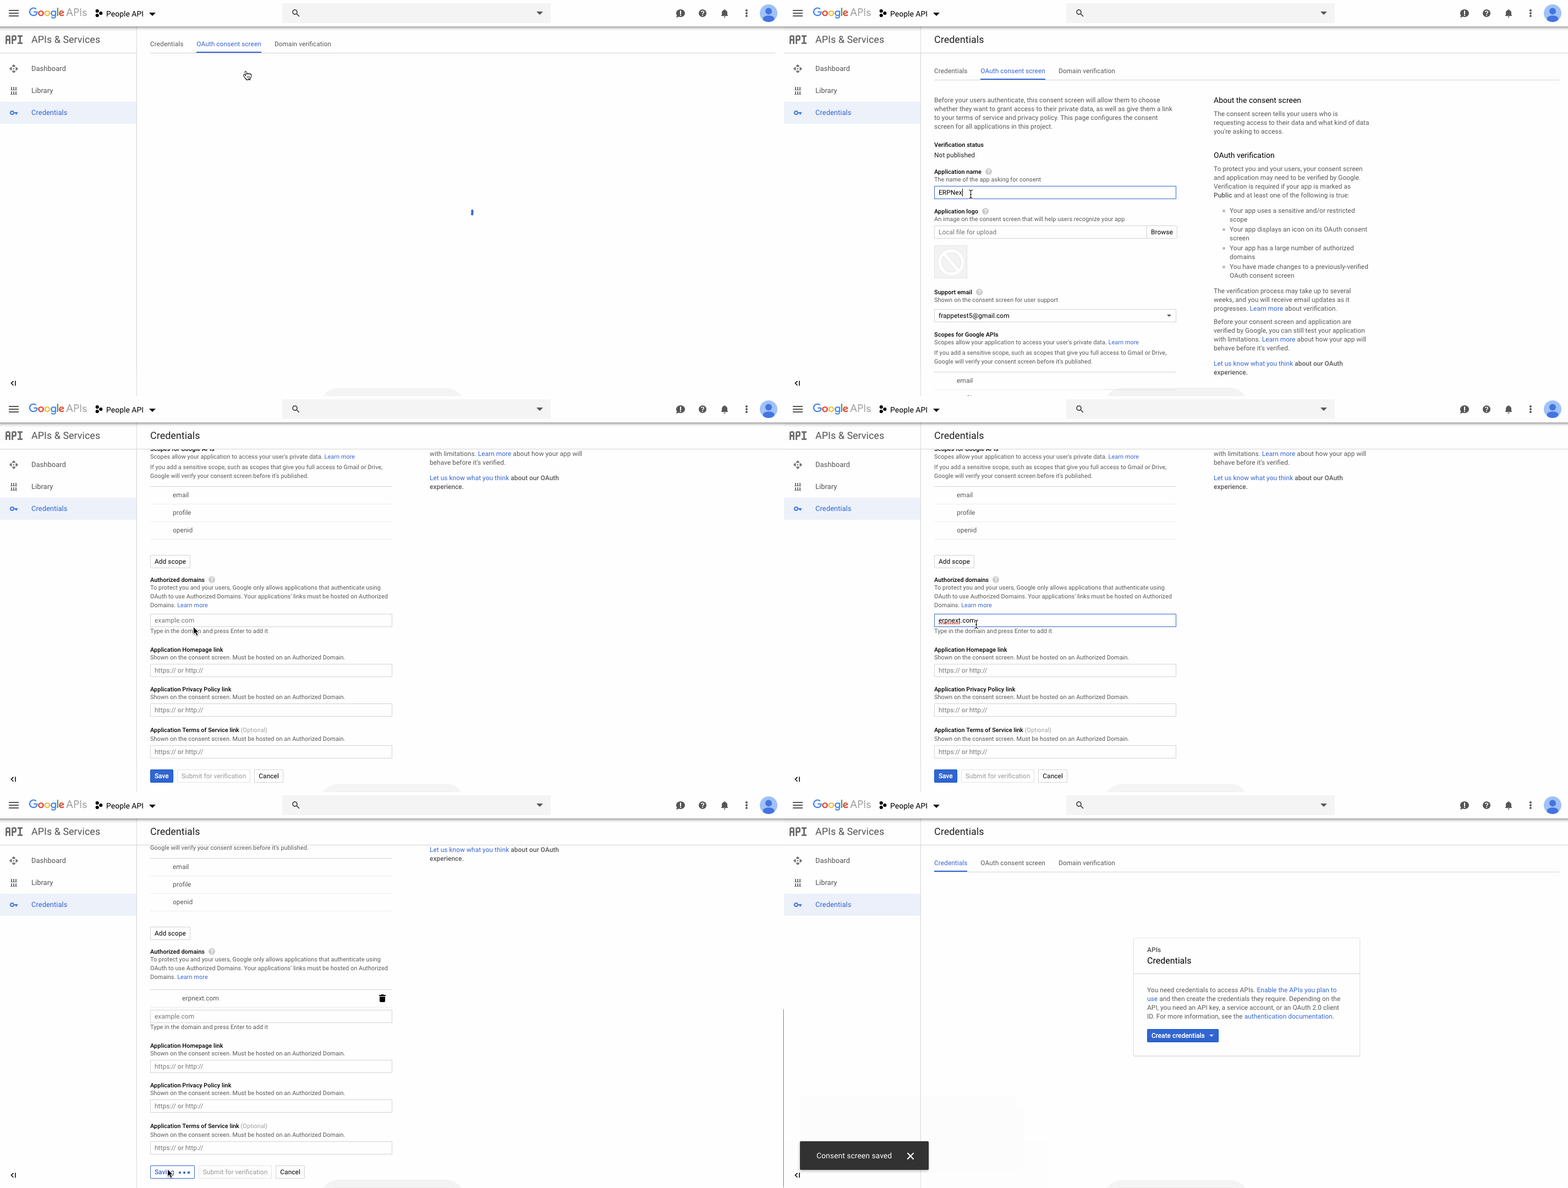
Step 1: Create a new project on Google Cloud Platform and generate new OAuth 2.0 credentials..

Step 2: Enable API access in the API Library for Google Drive by searching for and enabling “Drive API.”
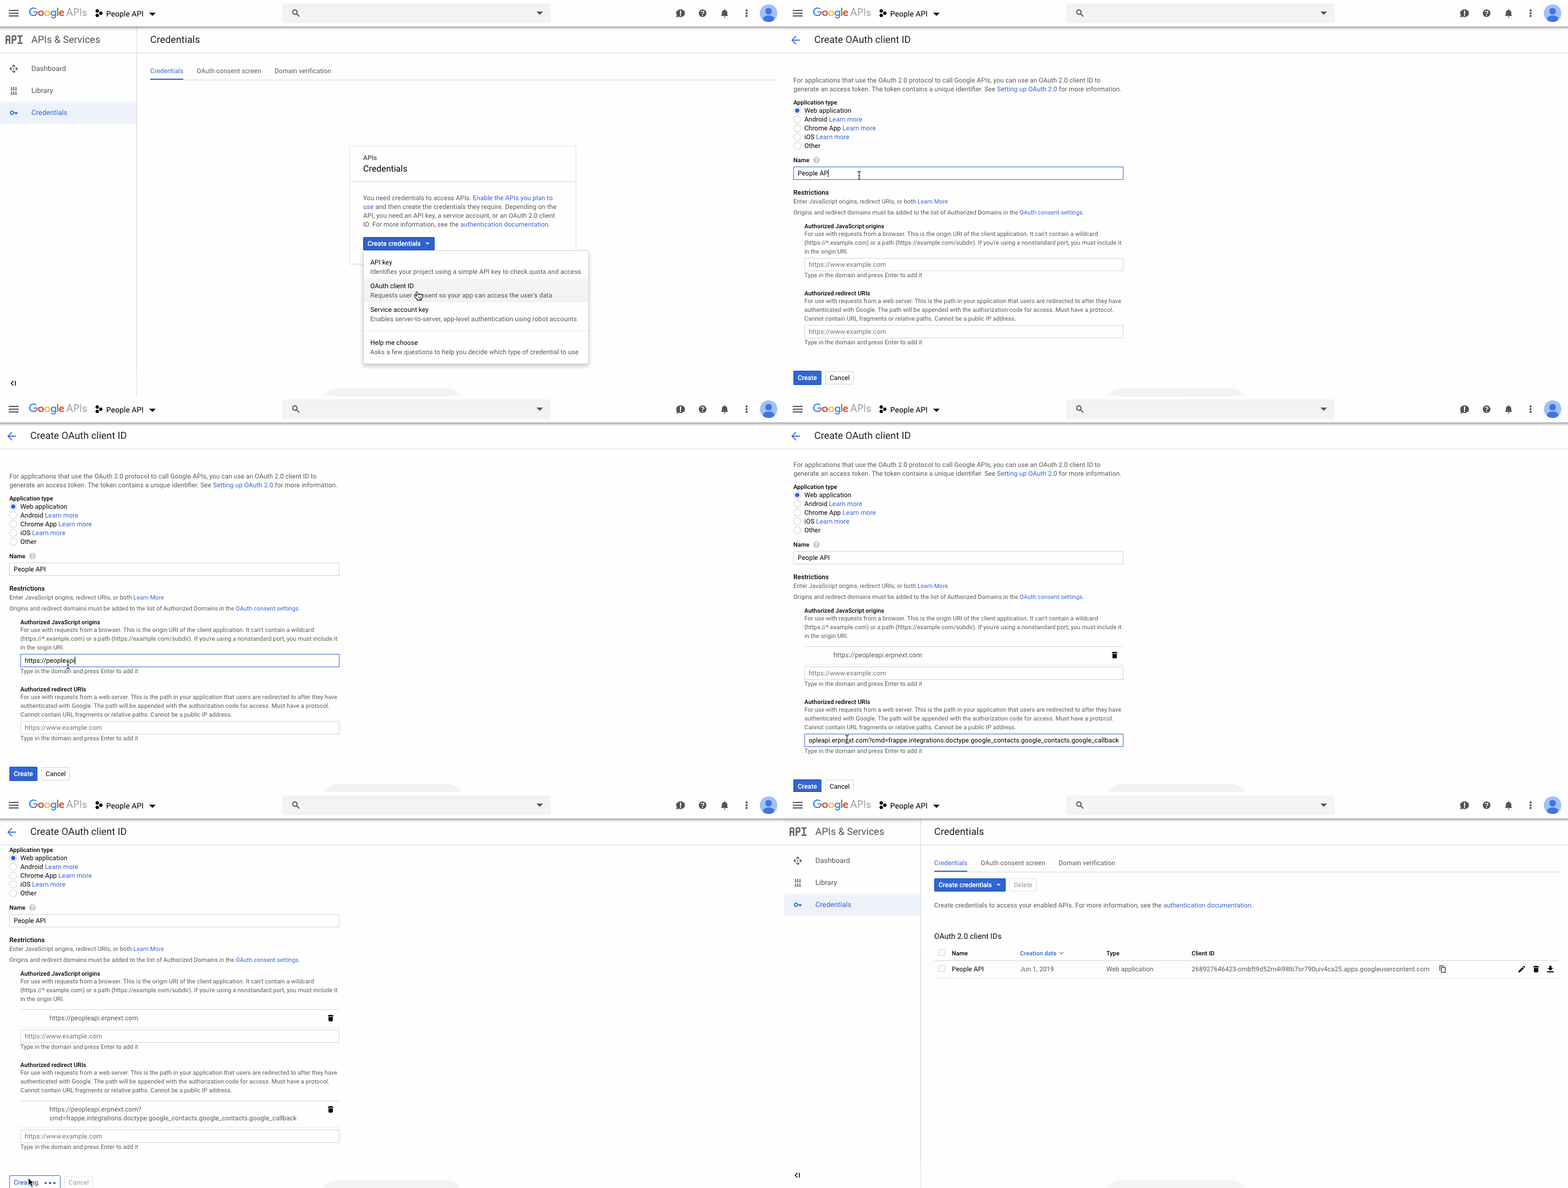
Step 3: In “API & Services” > “Credentials”, create a new credential and select “Create OAuth client ID.”
Step 4: Select Application Type "Web Application"
Step 5: Add https://{yoursite} to Authorized JavaScript origins.
Step 6: Add https://{yoursite}?cmd=frappe.integrations.doctype.google_drive.google_drive.google_callback as an authorized redirect URI.

Step 7: Add your Client ID and Client Secret in the Google Settings in "Home" > "Integrations" > "Google Services" > "Google Settings".
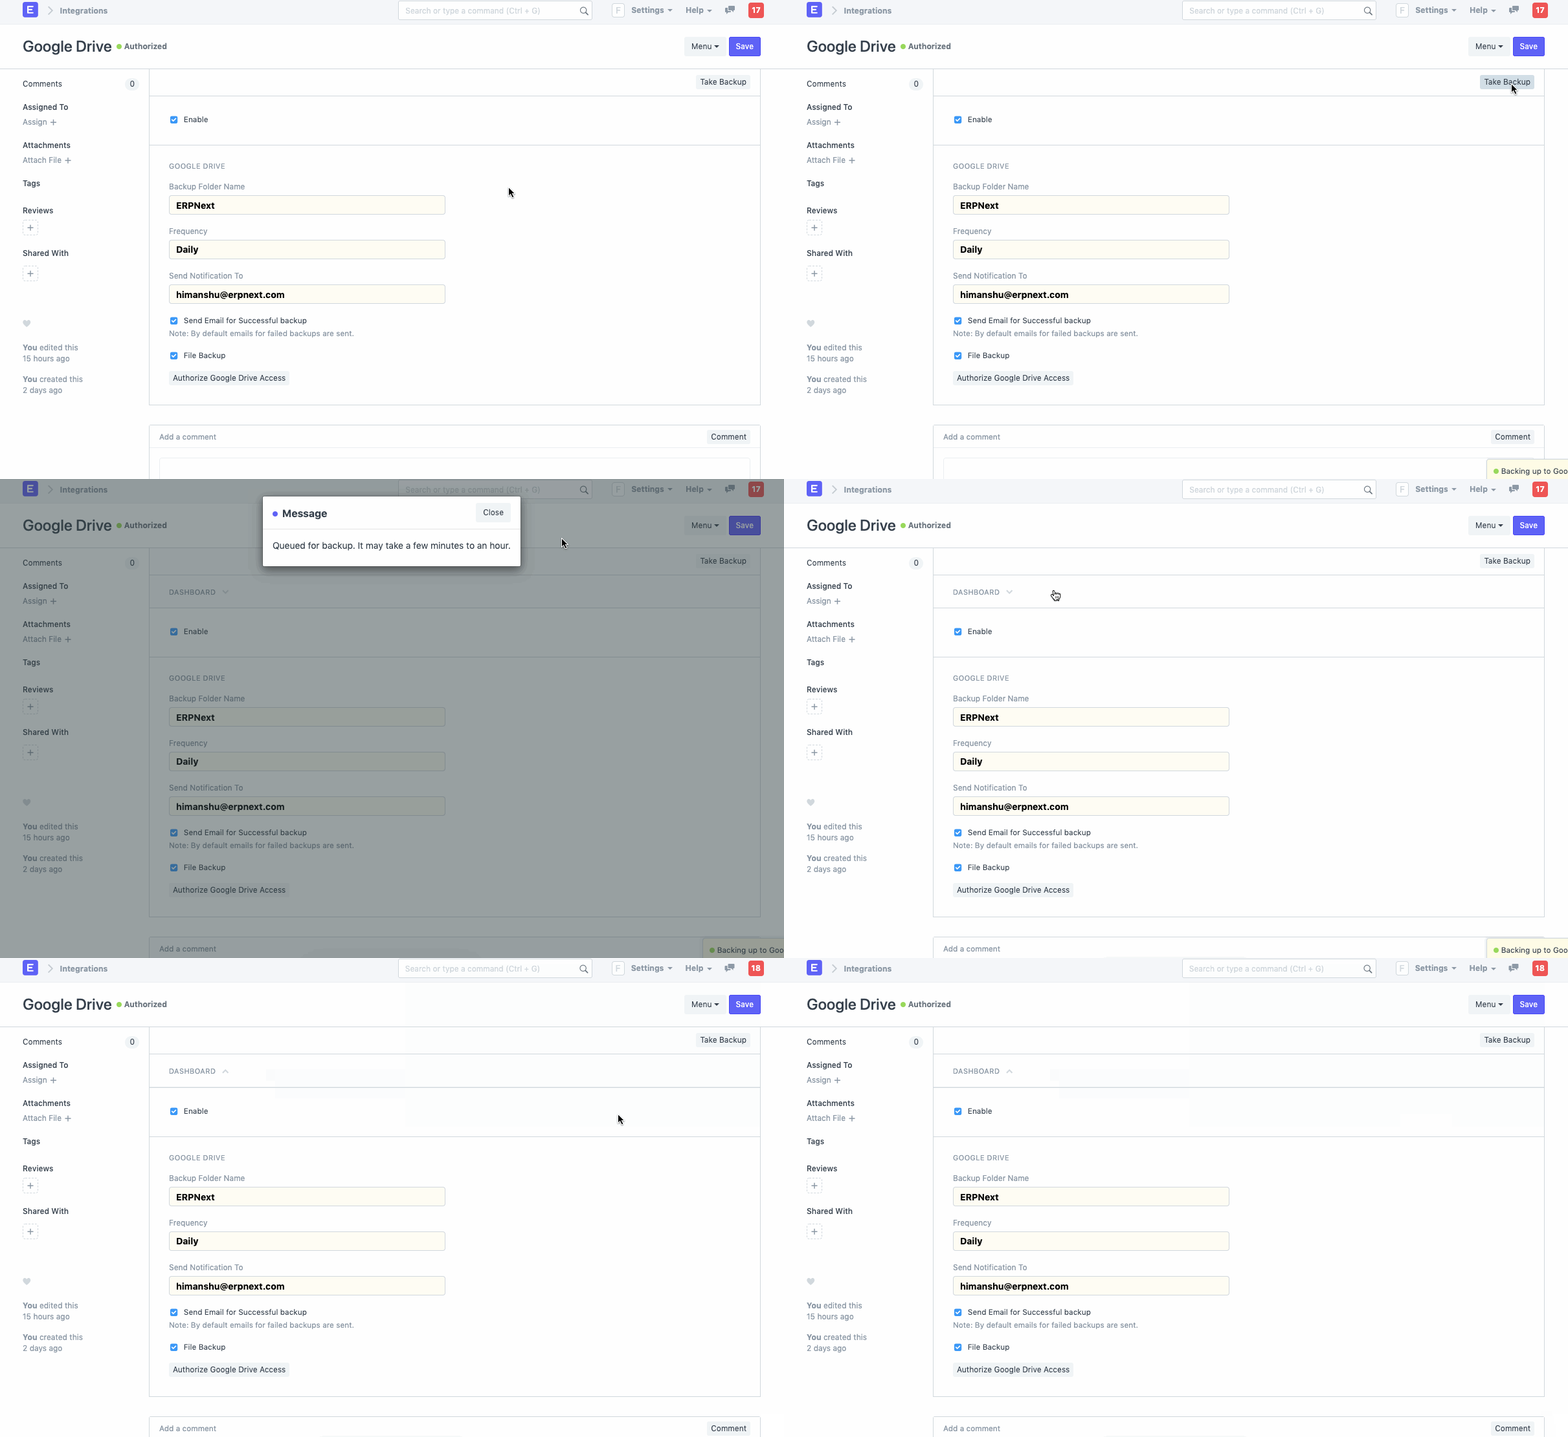
Step 8: In the Google Drive list, click “New” to create a folder for ERPNext backups. Enter your folder name, backup frequency, and the email for backup notifications, then save.
Step 9: Now click on "Authorize Drive Access" to authorize ERPNext to push files to Google Drive. Once Authorized, you can save your backup to Google Drive.
Step 10: To backup data manually, click “Take Backup” in ERPNext. The process runs in the background, and you’ll be notified when it completes.

It is worth noting that if the compressed backup size exceeds 1GB (Gigabyte), the system will upload the latest available backup to Google Drive instead of generating a new backup file. Congratulations! You have successfully integrated ERPNext with Google Drive to back up your organization's data.
See Soladrive's managed ERPNext service plans here


