In this article, we will see how to configure backup plans in Acronis Cyber Protect.
To learn how to create a Protection Plan in Acronis, see this article. We shall focus on the backup module of the Protection Plan. Once you create a Protection Plan, you will see the Backup module. Toggle the switch next to the module name to activate it and see other configuration options. You will see the interface below.
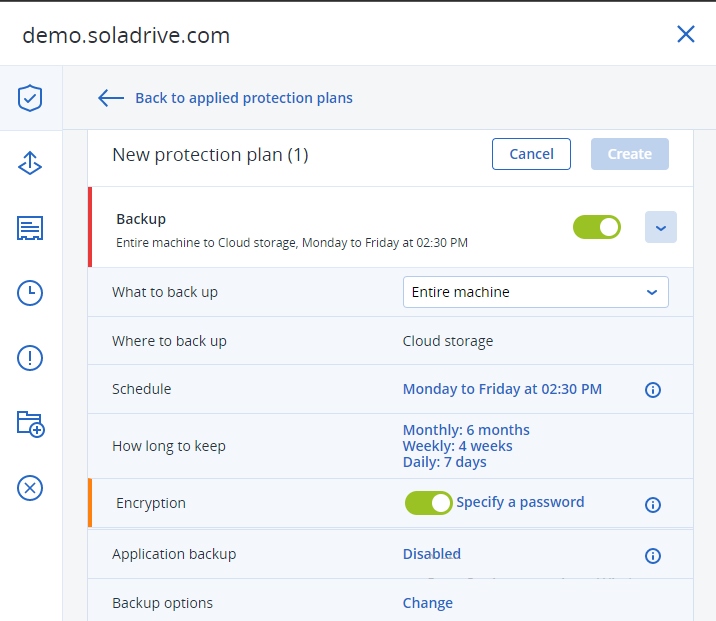
The first configuration option as can be seen is "What to back up". This is self-explanatory. It gives you three options. You can opt to back up the entire machine(this is the default for this setting), specific Disks/Volumes, or specific Files/Folders. If you select either of the other two options, you will see an option to specify which Disk, file, or folder to back up. And this option will open a File/Disk explorer which is very easy to use to navigate to the specific location you want to create your backup. It is recommended that you back up the entire drive.
The second configuration option allows you to select where to back up the selected files or devices. The default here is "Cloud Storage". If you have other backup locations configured in Acronis e.g if you have an on-premise backup server or another cloud backup service, it will show up here. You can choose to have your backups in select locations or all of them.
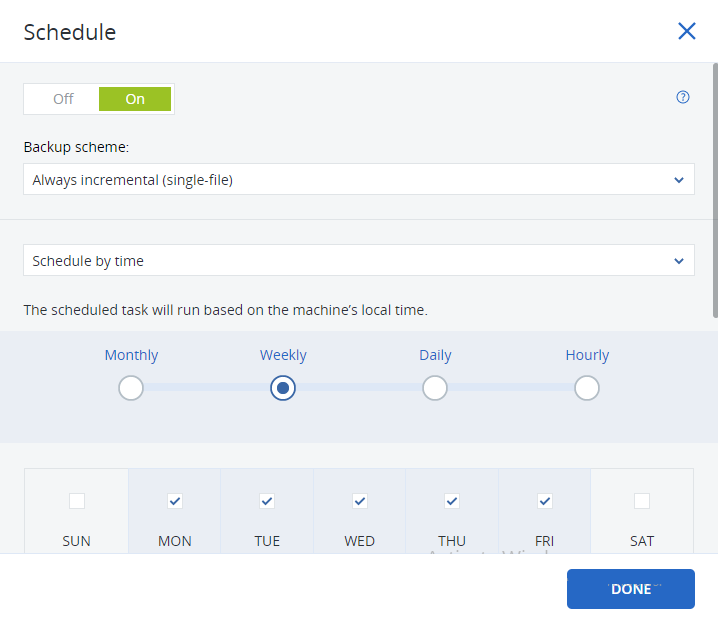
The third configuration option is the backup schedule. This setting allows you to select from a variety of backup schemes. The default setting here is "Always Incremental(single file)". This means that only changes to the file system will be backed up instead of backing up the entire machine each time. You can also select the criteria of the backup schedule. The options here are:
- Schedule by time
- Upon time since last backup
- On the system startup
- On the system shutdown
You can set a flexible backup schedule with these options. The interface looks like the image below.
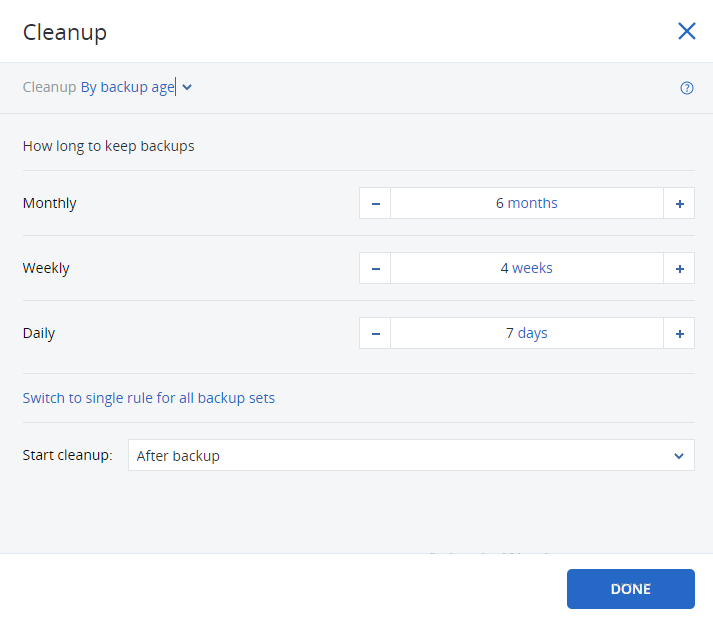
The next configuration option allows you to set how long to keep the backups. It allows you to set how backup will be cleaned up. The options are to clean up backups by age (clean up backups older than this amount of time), to clean up backups by the number of backups (cleanup the oldest backup when the number of backup files exceeds this number), or you can choose to keep the backups indefinitely. This flexibility is excellent for data center space management. The interface looks like the image below.
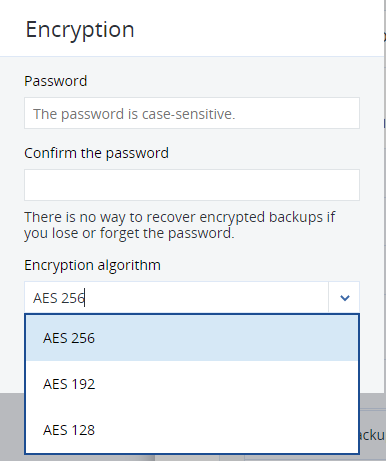
 The next configuration option allows you to select whether or not you want your backups to be encrypted. But it goes beyond that. It allows you to select from three encryption algorithms and also to set your encryption password. If you choose to encrypt your backups, be careful to safely keep your encryption password since you cannot decrypt your backups without this password. This interface looks like the image below.
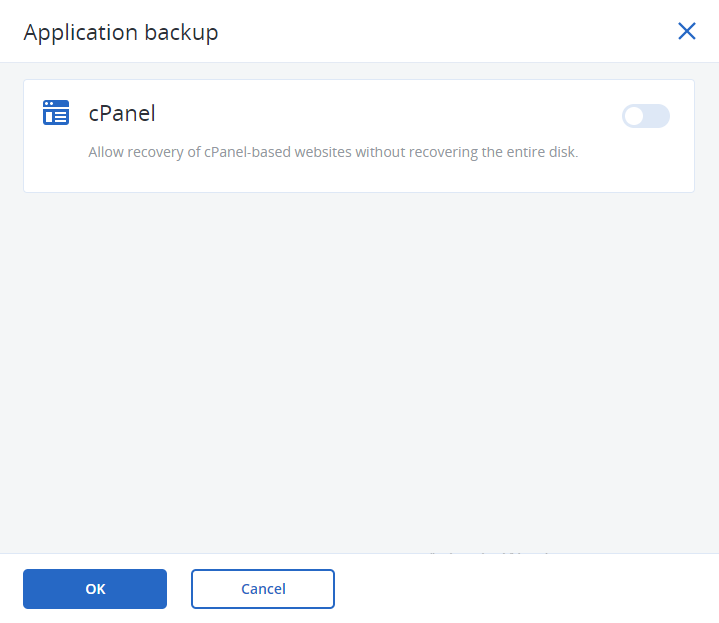
The next configuration option allows you to enable/disable application backups for specific applications on your device or server. The options available here depend on the components of the agent that have been installed and configured on the specific device. Application backups can include, Microsoft SQL Server, Oracle Databases, Cpanel, and many more. In our example, the only option available is Cpanel as seen in the image below.
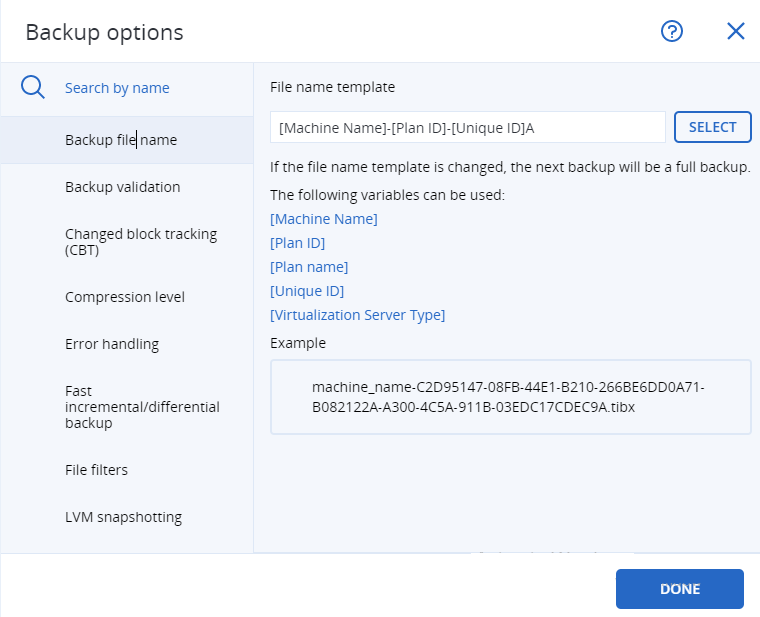
The last configuration option offers a myriad of advanced and technical backup options which include setting alerts, setting how backup files will be named, backup validation, compression level, error handling, file filters, and many more. You should consult your Acronis service provider or your server administrator to learn what these options mean for you or if you should change them. The interface looks like the image below.
With this information, you can now create a backup plan on Acronis Cyber Protect from your own Customer's control panel.


