This article will show you how to backup and restore WHM servers using the Acronis WHM/Cpanel plugin. The installation of the plugin to WHM is covered in this article.
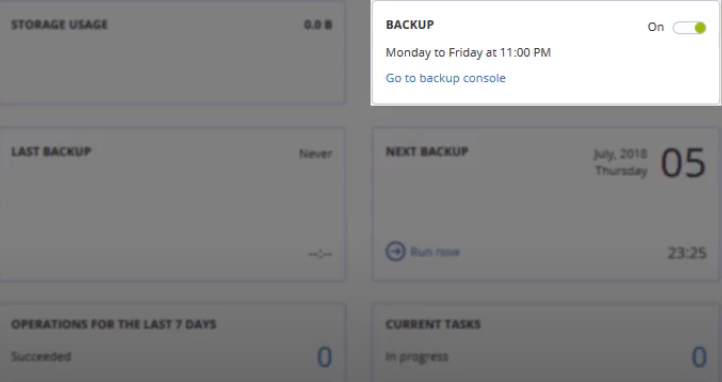
Within the Acronis backup management dashboard in WHM, you can configure the backup schedule by clicking on "Go to Backup console" as shown in the image below. This will bring you into the Acronis backup management console where you can fine-tune your backup plan for your WHM server. You can enable or disable backup at any time by clicking on the Backup toggle switch shown in the image.
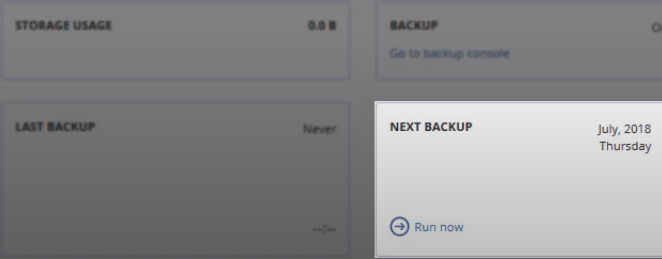
From the Acronis backup plugin for WHM and CPanel, the WHM administrator can perform backup and recovery operations on demand. To perform a server backup within the plugin page, navigate to the Dashboard tab, then on the "Next Backup" section, click on "Run Now" as shown below. Depending on the server configuration and the settings on the Acronis Protection Plan, the time this operation takes may vary. You can track the backup progress on the "Last Backup" section on the left-hand side of the "Next Backup" section.
As soon as a backup is created, it appears on the "Backups" tab. The first backup performed right after the plugin installation is a full-server backup. It creates a snapshot of the entire WHM server. This includes all the CPanel accounts and databases. The subsequent backups are incremental which means they only backup the files that have changed since the last backup.
To perform a full backup recovery, navigate to the "Backups" tab, click on the desired recovery point and click on the "Recover Entire Server" button as shown below. While performing a full server recovery, you should note that all changes that have taken place after the selected recovery point will be lost. The time taken by this recovery process depends on the server configuration. During the recovery, the WHM server will go down and then restart.
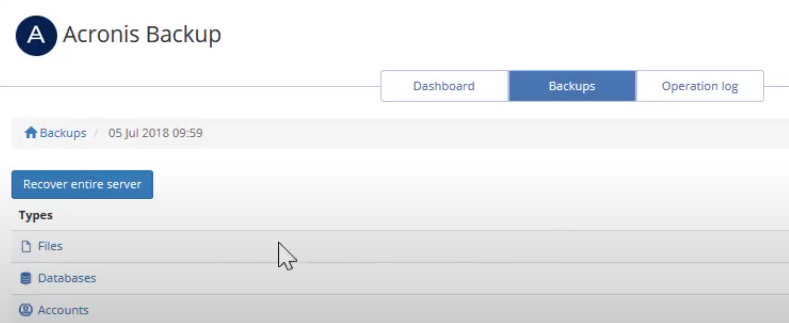
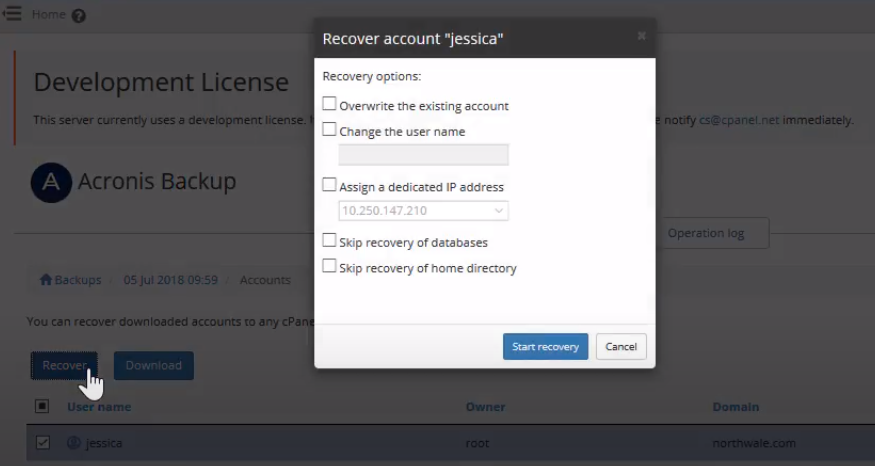
The WHM administrator can also perform granular recovery of individual accounts, databases, and files. To perform a granular recovery, navigate to the "Backups" tab and click on the desired recovery point as shown in the image above. Below the "Recover entire server" button, you can select either files, databases, or accounts for your granular recovery. For example, let's click on accounts to bring up the list of accounts that can be recovered. Some additional options for the account recovery can be configured as shown below. The first option is to overwrite the existing account. The second is the option to change the username. The third is the option to assign a dedicated IP address to the user. The fourth is to skip the recovery of databases and the last option is to skip the recovery of the home directory.
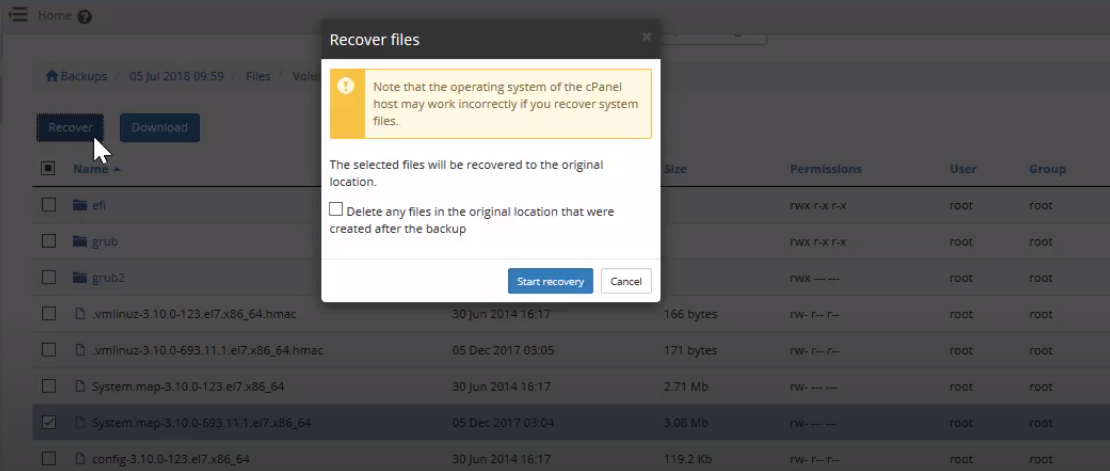
If you want to recover specific files, all the files you select for recovery will be recovered to their original location. As shown below, you have the option to delete any files in the original location that were created after the backup. This means that if your server was hacked, all the malicious files will be deleted during the recovery process.
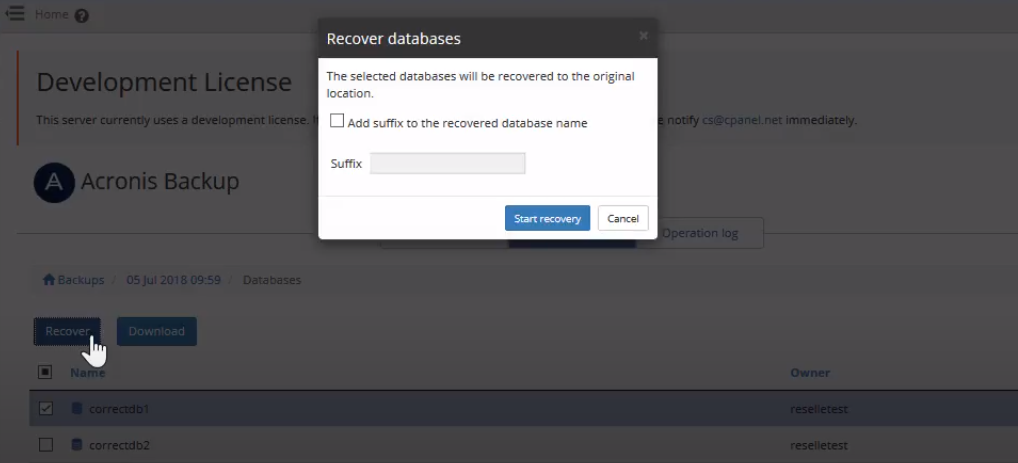
To recover databases, you can perform the recovery either to the original location or you can recover it as a new database. If you choose to recover to the original location, the existing database will be overwritten. If there is no existing database, a new database will be created. You should note that if the existing database had a user assigned to it, you will need to manually reassign the user after the recovery. If you choose to perform the recovery as a new database, the name of the recovered database will contain a suffix that you will define as shown below. In this case, the existing database will not be affected. You will still need to assign a user to the new database manually.
Apart from recovery operations, the WHM administrator can also download all of the recoverable entities to a local machine. You can download the entities and recover them later using native CPanel scripts. The download button appears next to the recover button in all instances.
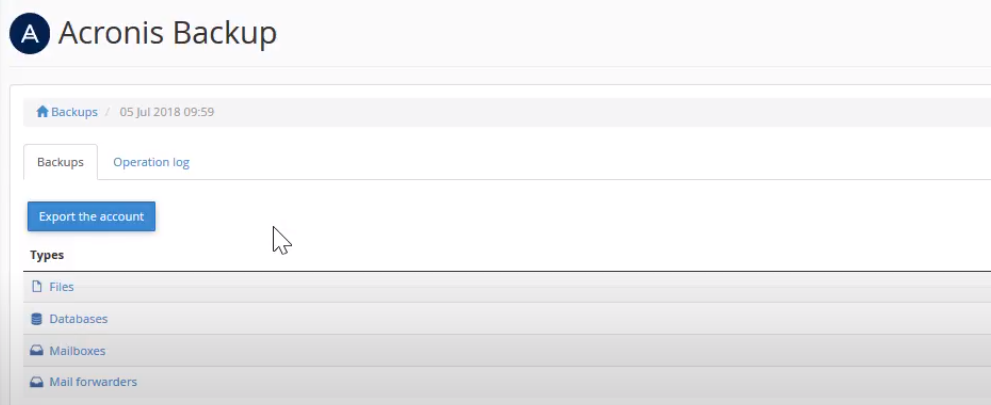
AS a CPanel administrator, you can perform granular recovery of individual files, databases, mailboxes, and mail forwarders as shown below. You can also export the entire CPanel account.
The recovery process of entities in the CPanel user interface is similar to the recovery process within the WHM user interface. This includes the recovery of mailboxes, mail forwarders, and mail filters.


