This article will outline the granular recovery of Microsoft 365 Teams with the Acronis Cyber Protect cloud. For the process of creating a Microsoft 365 Teams backup in the Acronis Cyber Protect cloud, see this article.
Browsing a Team Backup
You can access and browse any backup for any team created or stored in the cloud.
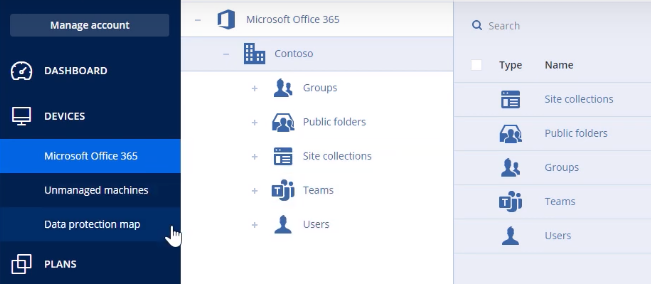
Step 1: Log in to the Acronis Cyber Protect console as an administrator. Navigate to "Devices" then Microsoft 365 in the left-hand side menu as shown below.
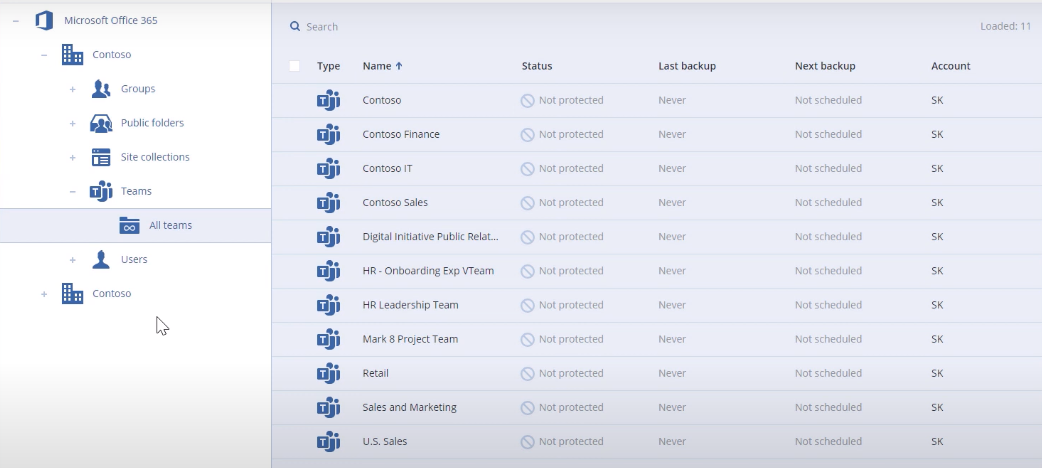
Step 2: On the Microsoft 365 menu on the left-hand side of the screen, expand the section "Teams". Here you can see all the teams available for the selected Microsoft 365 organization as seen below.
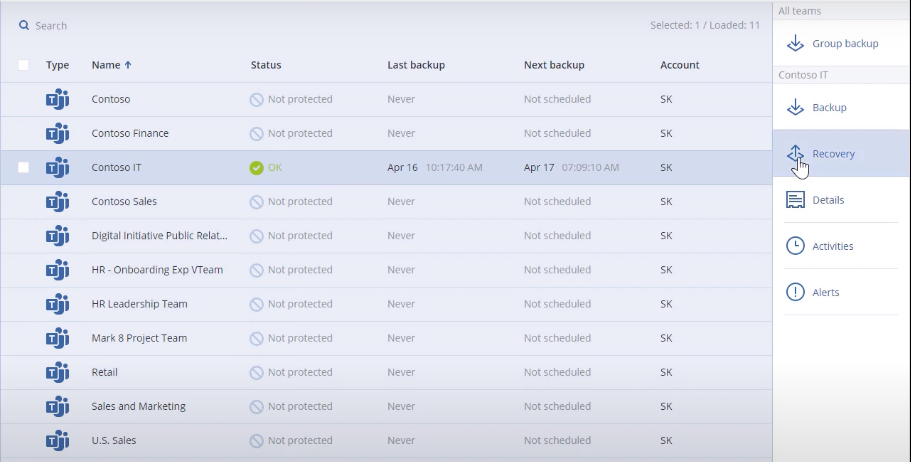
Step 3: Select the desired team from the list then click on the "Recovery" button on the right-hand side pop-up panel as shown below.
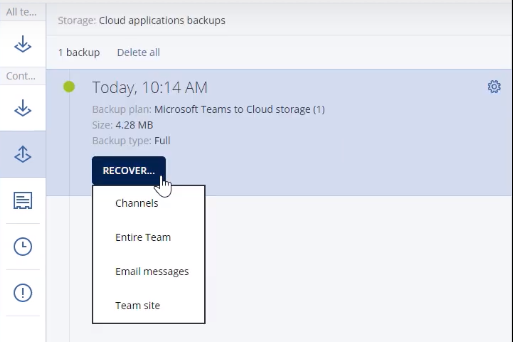
Step 4: Select the desired backup and click on the "Recover" drop-down list as shown below. As seen, you can browse through channels, e-mail messages, team sites, or the entire team.
Step 5: Click on "Channels" to browse through the conversations and files. For example, the image below shows someone browsing through the conversation bodies. You can search for keywords and phrases appearing in the conversation bodies and files metadata.
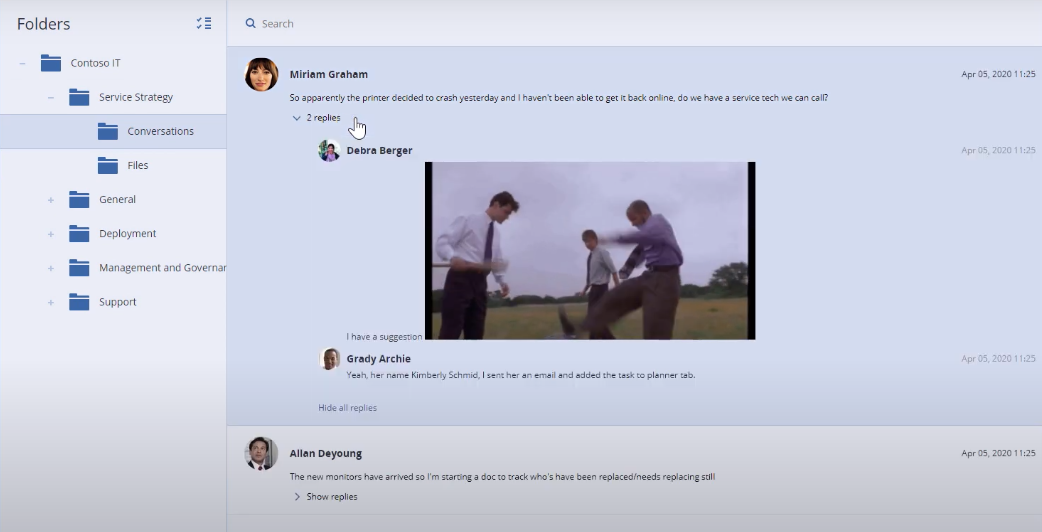
Moreover, you can download the channel files in their original formats in the channel conversation as HTML by clicking on the "Download" button on the top right-hand side panel shown in the image below.

Recovery of Channel Files
For Teams, you can perform the full recovery of the entire team as well as granular recovery of specific e-mail messages, channels, and team sites. We will perform the recovery of channel files as an example.
Step 1: Select the desired team from the list of teams as illustrated above, select the suitable recovery point and click on the "Recover" drop-down list again, and select "Channels".
Step 2: Navigate to the desired file or find it using the search utility available. Select the file then on the right-hand side pop-up panel, click on the "Recover" button as shown below.

You can perform the granular recovery of the selected channel file(s) to the same channel or a different channel. You can also recover the file(s) to the same team or to a different team. Moreover, if you have more than one Microsoft 365 organizations set up, you can recover the file(s) to the same organization or to a different organization.
Step 3: Select the destination of the recovered file(s) from the next interface as shown below then click on the "Start Recovery" button.
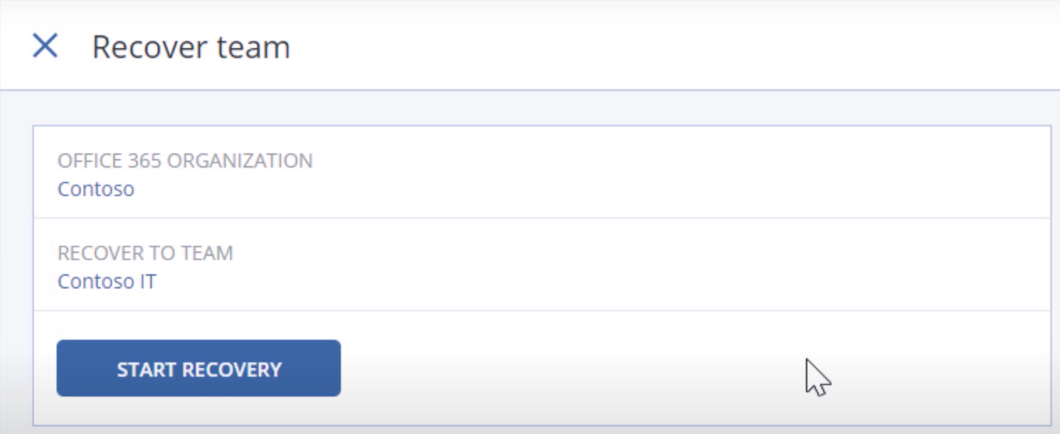
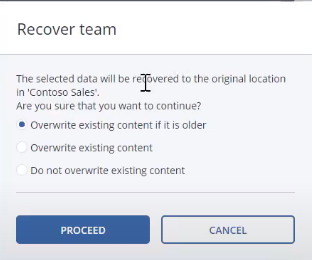
Step 4: Select the desired override option from the next interface as shown below, then click on the "Proceed" button to initiate the recovery process.
Along with the granular recovery of specific channel files, you can recover all the channel data at once. On Step 2 above, select the desired channel instead of drilling down to specific files. Then click on the "Recover" button. The process of recovering all channel data is similar from Step 3 onwards.


